Showing posts with label recipe. Show all posts

Wednesday, September 12, 2012

Junque Food: Lacto-Fermented Pickles


Hey Folks!

I've been on a quest to make REALLY GOOD dill pickles.

I've done the canning thing, and I don't care what recipe you bring me, any pickle that is water-bath canned (meaning heated up to process) SUCKS.

Don't give me that "alum" and "grape leaves" bull-crappy...if they get heated, they get soggy.

I hate soggy pickles.

Do you remember those old fashioned deli style pickles?  The ones that were in a crock on the top of a deli counter? I do.  Big, fat pickles that crunched, and were sour and garlicky, and your mouth would water just by looking at them?

Dang, I need a napkin.

Well, folks, the secret is out. Those really good, and CRUNCHY deli-style sour pickles were "lacto-fermented."  This means they are made the same way sauerkraut is made - but putting them into a brine of salt water and spices, covered and left to ferment for about a week.

I've made one successful batch, and before that a not so successful batch.This was partly because the recipe I used had the salt to water ratio too high, so I adjusted it the second time to much better results.

The other reason is because I, um, sort of forgot about them, and they sat in the brine for 3 weeks before I tasted them. So they were infinitely salty, and basically inedible.

Live and learn!

I printed out the recipe I used, but I didn't save the URL, so I can't give the author credit. I'm sorry.  If you happen on this recipe, and it's yours, please tell me and I will give you all the credit you deserve.

Sour Pickles

These are a favorite of many and a lot of people miss them when going on a Paleo diet, but the naturally lacto-fermented kind is perfectly healthy, curncy and sour. This version is flavoried with garlic and dill. Your garlic will too lacto-ferment and can be enjoyed afterwards as it will be packed with flavor.

Ingredients
  • 1 gallon (16 cups) picking cucumbers, unwaxed ( I didn't have a gallon of pickles, I just used what I had, which was probably 5-6 cups)
  • 2 bunches of fresh dill (I didn't have any fresh, so I used dried, and way more, about 5-6 heads)
  • 16 cloves garlic (I used about 8)
  • 3T pickling spices (peppercorns, mustard seeds, bay leaves, cloves) (I used all but the cloves)
  • 5 or 6 T of sea salt (I used 5)
  •  12 cups of water (distilled if possible, but it's not necessary. I have city water, and they came out just fine)

Preparation

  1. Soak the cucumbers in cold water for a few hours, then scrub them thoroughly to prevent any mold from forming during the fermentation process. (I also cut the tips off the cukes so that they wouldn't be bitter)
  2. Place the cucumbers,  dill, garlic and spices in your fermentation jar and sprinkle a bit of sea salt as you go a long (I did not add any extra salt, only what was in the brine).
  3. Prepare the brine of 5T of sea salt to 8 cups (I raised that to 12) of water, making sure to stir well to dissolve the salt and fill the fermentation jar with the brine so it covers the cucumbers.
  4. cover the jar and place it in a warm spot in your kitchen and allow the cukes to ferment for 5 to 10 days.
  5. A good way to know when it's ready is to taste it during the fermentation process. It's ready when you are satisfied with the taste.

Ok, so let's talk about a few things:
  1. it's best to use a glass container or an old fashioned crock. Metal will interfere with the fermentation process. I did see (and will reference below) a YouTube video where the author used plastic containers, and he said his results were just fine. I'm not gonna get all up in your business about it. The important thing about the container you use is that you have to have a lid that covers well and makes the pickles stay under the water. In the olden days, hypothetical Grandma would put her pickles in a crock and cover it with a plate held down with a stone. I put mine in an old crock-pot crock and inverted the dome lid it came with to hold everything under the water. Worked like a charm.
  2. Once the pickles taste the way you want them to taste ( and mine did after 3 days, so please test early and often), you can move them from your fermenting container to a smaller one with just enough brine to cover, and then refrigerate them.  This will slow the fermenting process, and keep your pickles from getting moooooooshy.
  3. You cannot can these pickles. Well, I mean, you can, but that means heating them up, and they will get moooooooshy.  Just eat them.  And then make more.  Seriously. They are easy, healthy, and best of all TASTY! I took some into work with me last week, and got some pretty darn good reviews.
  4. In my picture above, I also added some banana peppers to see if they tasted good lacto-fermented. they got bitter, so I'm not recommending them
 Here are a couple of YouTube Vids that I watched when I was coming to grips with purposefully fermenting food items that I was going to eat:


Saturday, August 11, 2012

Junque Food: Attempting Sweet Potato Chips

photo from www.examiner.com
This was originally posted in my other blog: Paleo Lifestyle in the Real World

 I'm always up for trying a Paleo version of junk food.  When I saw this recipe for homemade salsa with sweet potato chips, I knew I'd have to try the chips. I've made my own salsa before, and it's fine, but until my own tomatoes are ready for "salsifying," I can wait patiently.

But I couldn't wait to try to make chips. Crispy, crunchy, salty chips. Mmmm....

Sorry, I got lost for a second there.

I apologize, but I didn't take pictures of the process, but if you click the link above, the Amazing!Paleo chick does a great job of showing the process.


Thankfully, we'd recently purchased a mandolin to make even slicing of the sweet potatoes easy. I am not a precision slicer.

I followed Amazing!Paleo's directions to the letter, and was mostly happy with the results, except my chips did not all get crunchy. I waited for them to cool down, like the directions said, but several stayed limp, especially on the middle of the bigger chips.

So tip #1: I learned is that the skinnier the potato, the better off you are going to be for the crispiness factor. The wider the potato, the longer it's going to be to make them crunchy. Or you're just going to have to deal with limp chips. No Bueno.

Tip #2: The recipe on the blog says 10 minutes, give or take, on 375F.  The next time I try these, I'll do it longer at 325F. Lower and slower would DEFINITELY the way to go. I was in danger of incinerating my chips if I left them in longer than 12 minutes.

But I have to say, that despite the edges of a lot of the chips being burned, and the middles not being crunchy, the sweet potato chips tasted AWESOME. Seriously.

I will be making more of these. They will be a welcome addition of a treat to our Paleo Lifestyle.

Enjoy.

Tuesday, August 7, 2012

Junque Food: Salmon Filets with Broccoli Slaw

(this was originally posted on my other blog. You can see it at: http://realworldpaleo.blogspot.com/ )

Tonight I was home late because I'd gone grocery shopping after work. My lunch and p.m. snack were but a faint memory. I was tired, foot sore, and cranky.

And hungry.


But I did not want to make dinner.


People tell me that part of the problem with sticking to a Paleo-esque diet is all the prepping and cooking, and planning, and shopping...


Honey, I did South Beach when it first came out, and followed the memu in the first edition of the book for the first month before I felt confident enough to mix it up on my own. And I was cooking for 2 other people in the house who were also doing the diet - so I know from prep time. And cooking, and shopping, etc. ad Nauseum.


But it seriously, doesn't have to be a big-assed deal. Take tonight, for instance, I didn't want to cook, so I made the quickest thing I could thing of.

I made Salmon Filets and Broccoli Slaw.

Isn't this a beautiful dinner?


It really does taste as good as it looks, too. I know, because DaHubster is behind me making yummy sounds as I type this.

The salmon filets were cooked my favorite way - half pan seared, half poached. That sounds complicated, but all you do is get a skillet really hot, with a tiny bit of oil. Then put the filets in the pan flesh side down, cooking for two minutes. Flip the filets over, pour in chicken stock halfway up the side of the filet, cover, turn the heat as low as it will go, and let it finish cooking about 4-5 minutes. I threw some green onions in there before covering, too.


Easy, right? And it took all of 10 minutes.

The slaw took maybe 10 minutes as well, and here it is:
  • Buy per-shredded Broccoli slaw from the store, and if you are so inclined (as I was), an additional bag of shredded carrots. I only used a handful of the carrots, btw.
  • Slice up 1 or 2 green onions
  • Mix in a bowl.
Dressing for slaw:
  • 2 parts Red Wine Vinegar (or lemon juice if you don't use vinegars)
  • 1.5 parts good olive oil
  • about 1 teaspoon brown mustard (for emulsification)
  • about 1/4 teaspoon honey (to cut the acidity)
  • Spices to your liking. I used salt, pepper, red pepper flakes, and oregano
Put into a jar with a lid and shake. Then lightly coat your slaw.

Viola!

Now, as far as vinegar not being Paleo, well...that's your determination to make. I use it, and I don't think there's too much a problem with it. It's technically not "of the time frame" but I haven't heard any overtly negative reactions bodily too it, so I'm not really worried about it.But if you do not want to use vinegar, lemon juice is a very good substitute.


So really, it was 15 to 20 minutes of prepping and cook time. And I have to tell you, I am not feeling so cranky anymore, now that I've eaten that.


Enjoy.

Sunday, July 29, 2012

Junque Food - We've become smoothie monsters!

Why is it I never take a picture of the marvelous smoothies DaHubster has been serving lately?  Probably because I've been sucking them down too fast!

He drinks them for breakfast, and I usually have them as a morning or afternoon snack.

They are pretty easy to make. There are multiple recipes out there, but I find that they are basically the same. Most of the Paleo recipes have a green tea base. So I brew up a pitcher of green tea, and stick in the fridge, it lasts most of a week.

We also use an egg protein powder, mainly because it's cheaper than using eggs. It also helps my squick-y factor knowing there's no raw eggs in my smoothie. We use this version of the egg white protein powder:
Eggwhite Protein - 100% Pure Unflavored 1 lbs, though I see there are many varieties that are also flavored. I might have to to talk DaHubster into trying a vanilla or chocolate the next time we order it!

After that, the fun begins. We almost always use bananas and strawberries. We buy 2-3 bunches of bananas at a time, and slice them and freeze them for easy use. Same with strawberries. It's just passed strawberry season for us now, but I stocked up, and we froze and dehydrated a bunch for awhile. I wish we'd gotten more!

If you want a smoother smoothie (heh), go for some coconut milk. 1/3 to 1/2 a can is all that is needed for a blender full of smoothie goodness.

Just a note for those of you who are trying  out the Paleo lifestyle: make sure you read the label on cans of coconut milk.  Thai Kitchen brand is the only in-store brand that I've seen that is 100% coconut, with no preservatives. Usually, the preservative is Guar Gum, which in the scope of things, isn't so bad, but if you looking for pure, Thai Kitchen is probably your most affordable bet. Unless you go organic, which is too rich for my blood right now. Or make Coconut milk yourself, which I haven't yet tried to do.  But here's a recipe for those of you that want to try! :)  Gluten Free Coconut Milk from Elana's Pantry

Unsweetened cocoa powder is another thing we've tried. Just remember a little goes a looooooong way.  It gets bitter if you use too much. Try a half teaspoon first, and add more if you like.

If you want more nutritional goodness, try some crushed or powdered flax seed.

And for those of you that want a sweeter smoothie, add some honey. I did that in the beginning, when my tongue was still craving sweets. Lessen the amount of honey over time, and watch your taste buds come to life with the natural flavors of the fruits you put into your very own homemade smoothie!


Wednesday, July 11, 2012

Junque Food - staving off the boredom of salads

I always say that I love me a salad that I don't have to make. That rule gets relaxed in the spring when I pick my first greens from the garden. But it's short lived. I really do get bored eating salads quickly.

And I'm not talking potato salads, cole slaw, or pasta salads. Those are temporarily off the menu while I try this Paleo Diet thing. And if you haven't read me gushing about my personal experience with Paleo diet, click here: Do you eat what you grow?

Ok, back? Good.

So back to salads. I needed to wrap my brain around the fact that salad doesn't necessarily have to mean leafy greens. Particularly for lunches at work, where the leafy greens tend to not stay fresh and crisp by lunchtime.

Since my body craves "crunchy" I've been making salads that have whatever fresh veggies that I have around. Here are some of the things I've been using, in various combos:

sliced or julienne carrots
celery
banana peppers
brocolli florets
slived green onions
crushed garlic
cucumbers

And I usually toss it with a red-wine vinaigrette and a splash of garlic-red chili sauce. Occasionally I'll sprinkle some Parmesan cheese on top for a little extra Oomph. Even though that's not Paleo, but it sure is tasty!!

I also made a pretty good better-for-you cole slaw this week. I had a bag of pre-shredded cabbage that I mixed with onion, garlic and a little more carrot than the teeny amount that comes in the bag. I dressed it again with the red wine vinaigrette in stead of sour cream and mayo. It was pretty darn good!

And the red wine vinaigrette turned the cole slaw a pretty shade of pink, too.

heh.

Share with some of your favorite non-traditional salads, please!

Wednesday, May 9, 2012

Musings from the Junque Pile with a little Junque Food thrown in.

Nothing much happened in the gardens this past weekend. It was stormy and rainy and just blech-y.  I was hoping to get my tomatoes and peppers outside and into their warm and comfy wall-o-waters, but it was not meant to be.

Instead, I cleaned up after animals (you can't have 3 cats and a dog and have no smells in the house, I don't care who you are), did a mountain of laundry (that I still have yet to fold), and the hubster and I took turns shaving and trimming the dog (I swear she's part wookie, and smells like one too).

Sunday I concentrated on cooking for the week. I made an awesome pot of refried beans there's no frying don on them, so I don't know why they are called that, except it sounds much better than "Mushed Pinto Beans."  They were totally NOM. I say that, and I don't even like pinto beans. Or much of any bean-y type thing, for that matter. Except Green Beans, and even those can get bean-y if left on the vine too long. Trust me, I know.

But I digress....

I made 2 loaves of bread.  I wanted to make it handmade instead of in the bread machine. I guess I felt the need to knead, if ya know what I mean.  I used a 1/2 combo of whole wheat flour and white flour, with a few teaspoons full of flax seed.  I also covered it in sesame seeds while baking.  The loaves weren't as fluffy as I'd have liked them to be, but I don't think they are super dense either. I'll find out tomorrow when I make myself a sandwich, or toast.

I also made beef tacos for dinner. Seemed fitting, since I'd made the beans.  I love tacos in any form. Fish Tacos - have I shared that recipe with you guys? If not, I will...totally a great recipe, and quick and simple.

Back on track...

I also made a bowl of Tuna salad for lunches.

We are also defrosting a set of pork chops and I just had DaHubster get some hot dog buns, so pretty much all the dinners, with leftovers for lunches are all set this week.

I feel pretty darn good about that.

Not bad for a crappy rainy weekend.

And if you are still with me...I give you: KITTY CAM! Live kittens, go watch!

Thursday, May 3, 2012

Junque Food - Banana Bread with a twist!

We have a TON of dehydrated bananas that are sitting on our food shelves, for the simple reason that DaHusband-Man went crazy and bought several dozen bunches of, specifically for dehydrating and storing.

Actually, that's not entirely true.  We love banana chips, and figured that they were the same as dehydrated chips. 
OH.
NO.
THEY.
WEREN'T.

come to find out, banana chips are deep fried, usually in coconut or palm oil. Not exactly healthy for you.

So we have all these jars of banana chips, that are CHEWY as all get out. We tried lots of things to make them palatable. We did the lemon wash so they wouldn't completely turn brown during dehydration.  We sprinkled cinnamon on them (He liked those, I didn't).  We were figuring it was a bust for the snacking dept, but they were something that could sit on our shelves, and we'd have them if we needed. 

So they sat.

For a year. and then another year. 

Until I couldn't stand it anymore, and decided to try to re-hydrate a few of them. I was in the mood for banana bread, but I didn't have any fresh (or over-ripe) on hand.

So I took a loose cup full of them and ran just enough water to cover them. and I let them sit for about an hour.  They soaked up the water, and were instant banana mush. Perfect for bread!

Banana Bread - this is the exact same recipe I used, but I found it already typed in Food and Garden Dailies. Thank you for saving me the time typing from out of my cookbook!
(Better Homes & Gardens, I got it in 1988)

In a large mixing bowl combine:
     1 cup all purpose flour
     2/3 cup sugar
     2 tsp baking powder
    1/2 tsp baking soda
    1/4 tsp salt

Add to the bowl and mix:

     1 cup mashed bananas (2-3 medium)
     1/3 cup shortening, margarine, or butter
     2 TB milk

Add to the bowl and mix:

     3/4 cup flour
     2 eggs

Stir in:

     1/4 cup chopped nuts
I actually skipped the nuts, but put in a cup of butterscotch chips....'cause that's how I roll.

Pour batter into a greased 8 x 4 x 2" loaf pan.  Bake in a 350 degree oven for 55-60 minutes or until a toothpick inserted near the center comes out clean.  Cool for 10 minutes on a wire rack.  Remove from pan and cool thoroughly on a wire rack.  Makes one loaf (16 slices).


Oh my.  it was good.  The only reason that I knew this bread was made with dehydrated bananas was that the bread had SUPER BANANA FLAVOR (complete with echo).

It was definitely a success, and now I know I can make banana bread anytime I want. We have tons of banana chips just waiting.....


Thursday, April 12, 2012

Junque Food - using up your Easter eggs...

How do you use up your Easter eggs now that Easter is over, and all eggs have been found by the kidlets. Well, unless you lived in my childhood household, where one egg managed to stay hidden for months. It was eventually found in the frame of a large portrait in the living room. None of the adults in the house took responsibility for being too clever to hide an egg where no one would ever look for it.

But I digress...

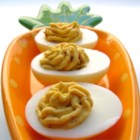
So, to you just shell and eat your hard boiled eggs? Make egg salad? or how about deviled eggs?

BTW, deviled eggs....doesn't that sound downright sinful for a pagan/secular symbol used to celebrate a religious holiday?

But they are so tasty...whatcha gonna do?

The filing in Deviled eggs is so varied and interesting. There are regional favorite ingredients galore to choose from, as well as family variations that old lady's will fight to the death to get their paws on.

I personally like a simple mix of yolks, mustard, mayo (not miracle whip), sweet pickle relish, and a sprinkle of paprika on top. If I'm feeling frisky, I'll blast it with Sriracha sauce.

But the interwebz has oodles and oodles of different recipes, from the sublime to the haute - and you don't have to fight Grandma for the recipe either...I want to try them all:


Caviar Stuffed Deviled Eggs from Better Homes and Gardens


Ranch Deviled eggs, I like this because the vessel is peppers and tomatoes, a really interesting twist! (also from BH&G)


Or how about Spicy Southwestern Deviled eggs? These sound awesome!  (from myrecipes.com)


and OMG! Bacon Cheddar Deviled Eggs.  My arteries are crying for their mommy right about now... (from allrecipes.com)


And lastly, this one could easily become my Mom's favorite: Blue Cheese and Bacon Deviled Eggs (from kitchendaily.com). Too bad they didn't have a picture to share.

So, do you hate me yet?  Don't be a h8r, dude...just go make some deviled eggs, and invite me over, OK?

P.S. Don't forget to crush those egg shells and throw them in your compost, or mix into the soil of your gardens...calcium is always appreciated by your veggies and flowers.

Thursday, February 16, 2012

Junque Food: Cooking Hash Browns in your Waffle Iron

Cooking Hash Browns in your Waffle Iron
I love hash browns, but I prefer them crispy. If I’m honest, I prefer them crunchy. Heck, burn them if you have to. OK, maybe not totally burned.  But I’ve never been able to make them crunchy without burning them at home. One day, while surfing Pinterest, I came across a pin for making hash browns in a waffle iron to make them crispy. EUREKA! A light bulb literally popped on above my head.  I went on my merry way, and totally did NOT pin that hashbrown recipe to my food board on Pinterest. Because I’m special that way. *nods*

Cut to last Sunday, I was looking for something to different to make for breakfast, and the light bulb popped on again. I ran to my computer, looked at my foodie pin board, and was devastated to find that I hadn’t saved that link. Oh well, off to Google I go!
  

Loaded? I am totally in!

So, me being me, I had to modify this guy’s recipe to get it to work for me. First, I didn’t have meat (he calls for diced ham, but bacon would be wonderful – neither of which I had on-hand, so we went meatless). His recipe appears to be for one waffle, I was cooking for 3 people, so measurements went out the window.  What I made was so yummy and filling, it was a meal unto itself. Here’s what I came up with:

Ingredients
  • 4-5 potatoes grated, rinsed and drained
  • ½ cup shredded cheddar cheese
  • 1 minced onion
  • 1 minced bell pepper, any color you like
  • 3-4 eggs beaten (depends on the amount of potatoes, you want them well coated)
  • ½ to ¾ cups flour
  • Garlic powder
  • Parsley flakes
  • Optional: diced ham, bacon, or sausage would all be heavenly in this

Mix all ingredients well. Heat waffle iron on high to as hot as it’s going to get.

Spray waffle iron with non-stick spray. Spray it again. And then do it a third time (I’m serious about this).

Spoon mixture onto waffle iron starting in the middle and smoothing outwards towards the edges. Don’t go exactly to the edge, so you leave a little for overflow. Close lid.

Now, leave it alone! Do not touch it for at least 7 minutes, unless it smells like it’s burning. Then, you know, do what you gotta do.

I checked mine after 8 minutes, most cooked for 10-12 minutes. Like Food Daddy suggested, I left the lid up for a minute, then gently lifted the crunch hash brown goodness out and onto a plate.  My mother and husband were practically beating me about the head and ears to get their mitts on breakfast. Or Brunch. Or whatever you want to call it when we finally ate.  The house smelled FABULOUS.

I ate mine with ketchup and hot sauce. My mom put butter on hers. Hubby ate his plain. A friend said she’d have slathered it with salsa, if she’d been invited (LOL).

Regardless, it was soooo NOMmy. Definitely a keeper.  I hope you like it.

Monday, October 24, 2011

Junque Food part 2 - how to use up a GIANT zucchini

Yesterday I got I wild hair to use up a GIANT zucchini that has been sitting in the kitchen for awhile. We'd already used one to make a tomato sauce based casserole (great vegetarian meal, BTW), but after having enchiladas the night before, I was looking for something different.

I turned to my trusty Good Housekeeping recipe book. It's the one we all have, with the red plaid cover. I'd gotten it ages ago as a wedding present, and have used the heck out of it. I already knew that this zuke was big enough for more than one dish, so I was planning on using half of it to make zucchini bread. I figured I'd freeze it for Thanksgiving. So that left me to find a casserole type dish that wasn't tomato based for dinner.

And the GH doesn't fail me.  Cheesy Artichoke Casserole, right there in the index. I tried to look up the same recipe on GH's website, but they didn't have it online. So here goes:

1 can of artichoke hearts
2 small zukes (I used half of one large one, seeded and cut into thin ribbons)
1 cup fresh mushrooms (I actually had some in my fridge), but a can of sliced 'shrooms would work well, thrown into the casserole just before baking)
1 small onion diced (I used 1/2 a large onion left over from yesterday's enchiladas)
1 8oz container of sour cream
2 tablespoons flour
salt
pepper
1/4 cup milk
1/2 cup shredded Monterey Jack Cheese (I used shredded Mozzarella)
1 package of refrigerated crescent rolls (I used bread crumbs instead)
Parmesan cheese

If you are using frozen artichoke hearts, cook as package directs. Canned 'chokes, I just drained and sliced into quarters, then set aside.

Place zukes, shrooms, and onion in a steamer basket, cover and steam over boiling water (about 2 inches) for 8 mins until crisp/tender.

While they are steaming mx sour cream, flour, salt, pepper together. Stir in milk. Drain veggies, and stir the veggies, including the chokes and the shredded cheese together in a casserole dish (I had to use an extra large lasagna pan to fit it all). Place the crescent rolls or bread crumbs and parm cheese on top of casserole and bake for 20-25 minutes in a 375 degree oven.

It was super good. Next time I might cover the casserole for most of the cooking time, and then take off the cover to let the bread crumbs toast more. I will probably add some more cheese, too.  'cause that's how I roll.

Sunday, October 23, 2011

Junque Food - What's Been Cooking at the Micro-Mini-Ranch

The name of the game the last few weeks (and into the indefinite future) is: "Use what you have." Since I am off work due to hand surgery, and Mom's currently looking for work, there's only daMan currently bringing in a full paycheck. Money is tight, as it is for most of you out there. But as a result, we've set upon ourselves the challenge to not grocery shop, except for necessities. We've been hitting the pantry, the canned goods shelves, and the last of the garden growings for our meals. And we are getting pretty creative about the whole thing too.

I'm a nut for tacos, and I've made fish tacos, meat tacos and I had a yen for chicken tacos, but I wanted something different, so I thought we'd try our hand at enchiladas. I didnt have a can of enchilada sauce in the pantry, though, so I pondered how to make it from canned diced tomatoes without blending. I do have a blender/food processor combo, but I'm not fond of it. It was a $10.00 cheapy thing I got at Walmart, but it's loud, and frankly, it scares the poop outta me. I really only use it to grind up cukes for making relish. Yeah, I'm a chicken. BAWK.

So anyway, how to get a sauce out of tomato chunks? I can, and have, used a potato masher. It does OK, but I have limited use of my hands at the moment, and mashing tomatoes as they simmer takes a long time. I'm just going to have to have chunks. Which is fine with me. Then it hit me. V8 juice! I usually have some on my pantry shelves. I like to throw a can of it in chili when I make it in the crock pot. Perfect.

Since we are going to have chunky enchilada sauce, I decide to go all the way, and con Mom into chopping up an onion, and some jalepenos I just picked out of the garden before they got frost on them. One was pretty close to being ripe, and it was so pretty I had to take a picture of it. Who knew that peppers turned red on the inside first? I didn't!

So the sauce was shaping up to be pretty decent. We used a large can of diced tomatoes, half of a very large onion, a good cup of diced orange bell pepper, and metric ton of Cumin (we love Cumin), a little bit of orengo, 2 cans of V8 juice, and simmered for an hour. Viola! sauce!


I used up some corn tortillas I had in the freezer, which was perfect, they were pretty dry and crumbly, and the sauce perked them up quite a bit.

I used a can of chicken, threw some diced onions in with it, rolled it up in the tortillas, and smothered them in the sauce. Served with a side of refried beans covered in gooey cheese and even more onions.

it was OH. MY. GOD. good. It officially deserved the NOMmy title. And that was Friday.  :)

Saturday, August 13, 2011

Junque Food - Breakfast Challenges

Good Morning! Did anyone try out some of the homemade beauty products I listed in my last blog? If so, let me know...throw me a comment.  I get responses at my Face Book page, but rarely here. My blog needs some lovin'...  :)

Anyhoo, I was talking with my friend Vino, and we were discussing healthy breakfasts. As I diabetic, I need to eat regularly, and breakfast is not my most favorite meal of the day. Mainly because I don't have time to cook it every day. However, what I have been known to do is cook ahead, portion off, and take breakfasts and lunches with me to work. When I do that I generally spend a fair amount of time on Sundays doing this. It gets old, especially when the weather is nice, and I wanna go play outdoors (Please, Mom...can I?).

I am particularly fond of making a no-crust mini-quiche recipe I found in a South Beach Diet book a hundred years ago. That particular recipe isn't online, but it is super simple in that you whisk up eggs, add some low-fat/no-fat shredded cheese, any diced veggies you have on hand and bake it in muffin tins. 2 "muffins" are your meal. That's an awesome recipe as you can package up the portions into baggies, freeze them, and they zap in the microwave in a couple of minutes (take them out of the baggie first or YUCK!).

Unfortunately, I get bored of eating the same thing for more than 3 days. I need variety. And I need to plan ahead, or I do nothing and am completely unprepared. When I'm in a good organizational mood, I can plan a week's worth of meals (not just breakfast, but lunch and dinner too), checked against what I have on-hand, make a list of what I need from the store, get it, prepare it, and I'm golden. I also get SUPER WIFE points, but that's a story for another time...

I can admit that my organizational skills have not been up to snuff lately. And as a result, I've made bad food choices. And my pants are a wee bit tighter than they should be at the moment. THIS MUST CHANGE!

So, here's some ideas I have for mixing it up in the breakfast department:
Yogurt (home made if I can get DaHubster to make it - he's the yogurt guru around here) or store bought with home made granola and frozen berries
Different variations on the baked egg dishes like this one I just found off the South Beach Diet website that looks decidedly NOM.
Bumping up my salad intake, and eating it in the morning (I've done it in the past, and can do it occasionally, but I get bored with salads quickly)
Sliced turkey wraps with a homemade veggie in vinegarette dressing

I need ideas, people! Help a sister out. Don't worry about sugar content or portion, I can work with anything. I've been doing it a long time, and can work pretty much any recipe to fit my dietetic needs. The only requirement is that I need to be able to make it ahead of time, and take it to work with me (I have access to a microwave at work).

If I try your recipe, I will happily send you a glass bead pendant from my stock of lampworking days, along with my thanks and gratitude. :)

Wednesday, August 10, 2011

Musings at the Junque Pile - Home Made Beauty Products

I thought I'd give you, dear readers, a break from my garden for a minute.

I have a confession to make. I'm cheap.

No, really.  I hate to spend money on myself. Ask anyone. And I have a seriously hard time remembering to do girly things like get a haircut (yes, we won't talk about that here), go get a manicure (I'm actually a few weeks overdue for a fill - this is my one vice, but I'm ignoring it right now) or a pedicure. I buy the cheapest facial scrub I can, only because it is cheaper to buy it than make it (except for the stuff I will tell you about below). But I do have a few on the cheap things that I do here at the micro-mini ranch that proves that yes, I am a girl. A girls gotta get a boost every once in a while, right?

The bestest gentle facial astringent/toner out there: Witch Hazel. No kidding. It's like what, a buck a bottle? My current bottle is going on 3 years old. Wash your face, grab a cotton ball soaked in this stuff, and go to town. Cleans your pores, tightens said pores, and doesn't burn or smell overly astringent. Leaves your skin feeling cool and firm, but not dry or tight. LOVE this stuff, especially in the summer time, when I produce enough oil on my face to fuel my car for a week (Oh, I wish).

The bestest cheapest foot soak for cleaning your feet without scrubbing: 2 cups of vinegar in warm to lukewarm water. I am a diabetic, and I have a condition called neuropathy, where the bottoms of my feet and toes feel like they are always asleep. It is not recommended that neuropathy sufferer's get pedicures, as you can't feel how hot the water is, and any cuts, bumps or bruises may go unnoticed and get infected. As a result, I am very careful with my feet. I have found that a vinegar foot soak is a great way to exfoliate my feet without major scrubbing. It also helps alleviate mild cases of athlete's foot (when done every day for up to 2 weeks). I still scrub, but I don't have to really scrub hard. Most of the dead skin cells are whisked away by the vinegar. And I'm sure that I don't want to know how that happens. I'm just glad it does.

For scrubbing rough, dry skin patches on your feet or elbows (or where ever you might have them), the bestest cheapest body scrub is: mix up 1/4 cup of sugar and just enough olive oil to saturate the sugar, but not dissolve it.  Then rub briskly on your dry patches, followed by a good soaping and rinsing.  If you do this to your feet, DO NOT shower afterwards. Your feet will be too slippery, and I don't want to hear about anyone falling and knocking themselves senseless. Put on some socks and go to bed.

Try these things out and see if they do just as good a job as some of those spendy commercial products. I believe you will be pleasantly surprised. If you find you do like them, make up small batches and add a drop or two of your favorite essential oil to give yourself a special spa-like treat.

Sunday, August 7, 2011

Junque Food -Banana Pepper recipes!

Whilst looking up some new 'Nana pepper recipes, I found some darn good ones (and not just peppers, too!)  to try!

Pickled carrots & jalepenos - YUM!

a pickled 'nana recipe that leave the 'nanas whole.

Stuffed Banana Peppers - these are breaded and deep fried (or pan fried, if you prefer)
Ricotta-stuffed Banana Peppers - a homemade take on "poppers"

Scrambled Eggs with Banana Peppers, Feta & Chives

Here's a comment on another blog that I will most definitely be trying: "Here's an easy recipe that I use all the time. Brown bulk sausage and drain thoroughly. Either melt a soft cheese product or make a quick white sauce and add your favorite cheese to it. Mix the cheese (or cheese sauce) into the sausage. Slice the top of the banana pepper off and make a slit down one side, seed the pepper. Spoon the sausage and cheese mixture into the pepper. Cover the entire pepper with store-bought canned crescent rolls to seal them up ( Large peppers may take up to 3 crescents, but with this , the more the better). Bake according to the crescent roll can. These are simply delicious. I usually make 6-8 peppers and refrigerate the left overs. A friend of mine gave me the recipe, but she uses hamburger instead. If you freeze your peppers whole, you can thaw them out and fix this any time of the year.
(from: http://chowhound.chow.com/topics/419306)


heck, I might go to the store right now and get some crescent rolls. :) 

Monday, August 1, 2011

Junque Food - Sunday meal

DaHubster and I have long been talking about buying meat locally from the farmer's market we frequent. The prices are more expensive than at the grocery store, but as we are wanting to try to eat more local it makes a bit of sense. Local farms produce grass fed meat, which is supposed to be healthier for you and the animal. Smaller farms have more expensive overhead than commercial farms. I get it. We are even rebellious enough to want to "stick it" to the government that dictates what and how we eat, even if it means paying a little more for it. Those of you who talk to me during the week have heard my political views ad nauseum, and I won't bring that hear. Sufficiet to say, we want to try locally grown meat, particularly lamb, which is claiming a premium in the grocery stores anyway these days, so why not?

There's a vendor at the farmer's market we go to who sells beef and lamb. They freeze it solid and take it in coolers to sell instead of taking orders one week and have their customers pick it up the next week. We discussed it amongst ourselves, wondering if we should try some lamb, and initially decided against it this week. Then changed our minds when the blueberries I'd wanted to buy for jam weren't available as I thought they would be. Hubster actually went back to the market to get it. Unfortunately, they were out of lamb steaks by that time, so he picked up 2 lamb shanks. Neither one of has cooked it, but the seller told DaHubs to cook it long and slow. He thought that meant indirect heating on the grill, more so than how you would cook a steak, but I had doubt. Calling on my best friend in the world, the internet, I saw that long and slow for lamb shanks really meant braising in a dutch oven for HOURS. The meat is tough. Looking around for recipes, I finally settled on this one. I figure if I have to cook it for hours, why heat up my house for it? So, the crock pot it is! this recipe has all the goodness we love in food: garlic, onions, more garlic, tomatoes, etc. It's going to be a hit, I just know it.


I also have a garden bounty salad marinating in the fridge of cucumbers, hot nana peppers, onions, and carrots. YUM.

I will let you know how it comes out.  :)

Saturday, July 2, 2011

Junque Yard & Junque Food

Hot and muggy. Wow what a change from the cold, rainy spring. I'm giving all kinds of props to DaHubster, who fixed our AC this past week. The man is a mechanical genius.  I can sweat it outside for a bit while I write this on my laptop (any spelling errors are due to the fact that I can't see the monitor outside), and then go inside and cool off. Then sweat some more as I start cleaning.

The veggies are finally starting to grow. The poor tomatoes have finally started to leaf out and I spy a few blossoms! The pepper plants all have blossoms or teeny tiny little baby peppers on them. It always cracks me up, the first little peppers on a plant that never looks big I  enough to support any weight. But the more you pick, and the hotter it gets, the more it grows. I love growing peppers.

The pumpkin "patch," a laughable term, as the pumpkins are squeezed into the corner of one raised bed. They are supposed to take up a huge amount of room, but I don't have the space, but I wanted my own sugar pumpkins for baking this year. I put them next to a fence, and will encourage them to grow up by adding a trellis. You can net the fruit so that it will grow supported and not drag down the vine. Keep your fingers crossed that that little experiment succeeds. These little guys have grown about 4 inches in the last week.

The potatoes have also grown. DaMan lobbed several inches of straw on top of them last weekend, and we feared that we over did it, and the straw would smother them. NOPE! They are growing up fine through the straw.

The strawberries are in the middle of their productive period. I've picked two bowls of these wonderful berries, and we've been eating them straight out of the garden. I've never enough to make my own jams. Instead I buy quarts from the farmer's garden to make jams. Occasionally, I get enough to make a strawberry shortcake, though I mainly just like them for picking and eating. Honestly, if there's nothing more perfect than an exactly ripe strawberry, I don't know what it is.

The raspberries continue on their journey. Staking them up was the idea I'd had in ages. it's going to be so much easier to pick them this year than last.

The loofa experiment is progressing slowly. The seeds have sprouted, and there are close to a dozen or so seedlings popping up in their container. I need to trellis them as I will the pumpkins. Scrubbies here we come!

The sugar snap peas are nearing their end. I'll plant another round in August for a fall crop. Love me some sugar snaps! BTW, I made 2 pints of that pickled sugar snap pea recipe that I talked about last week. AND THE ARE FABULOUS!!! I added a touch more red pepper flakes than the recipe called for, and they are wicked spicy, tangy with with the vinegar and other spices. So very good. You should try them.

I noticed that we do have peaches this year. Last year we had a bumper crop, and made peach preserves until we were sick of it. I'm told that peaches don't produce heavy quantities every year. I guess they are a lazy tree.  This is also an older tree, how old, I have no idea, it came with the house. But we've lived here for four years, and have only had 2 big years. I counted 6 peaches other night. They are slightly larger than olives at this point. We'll see how many others are hiding in there.

OK, its getting too hot out here, I'm going back inside...  :)

Sunday, June 26, 2011

Junque Food

On Saturday, I made my weekly sojourn to the Farmer's Market. Oh how I love looking at the bright flowers and veggies all lined up for sale. Unfortunately, the pickings were a little more sparse this week. I believe it was due to a combination of use getting there an hour before it closed, hence, most of the stuff was sold already, and probably due the fact that this is the time of the growing season where there's a slight lull.  The cold weather crops, such as lettuces, spinach, rhubarb, and sugar snap peas are winding down as the weather warms up, and the hot weather crops, such as tomatoes, peppers, plus everything else that takes 90 days or more to grow isn't ready for harvest yet.

I had read about a local artisan breadmaker in a local newsblog. I was hoping for a chance to speak with her, as the article as about her flax seed bread that she makes with no sugar. NO SUGAR? You heard me. No sugar. I had to ask her how she did it, because I was always under the impression that yeast needs fuel to rise. Here's a little secret about me: I'm shy. I hate walking up to people I don't know and engaging in conversation. Well, hate is wee bit strong, but I definitely get heart palpitations. But I really was curious, so I sucked it up and went to go speak to this woman. I really shouldn't have worried. She was bright and welcoming, and instantly offered a sample of her bread - a standard ice breaker. And it was wonderful! crusty on the outside, soft and chewy (but not in the over-processed way of commercial breads) on the inside. I mentioned that I'd seen the write up on her in the local newsblog, and she beamed, and bubbled, and said that she'd gotten quite a response from it.. And so our conversation took off.

I asked her about the no-sugar thing, and she explained that yeast doesn't *need* the sugar for fuel, but sugar does help in making the bread rise faster. She told me how long she lets her bread rise (first rise usually overnight in the fridge), how she prefers to cook it open on a baking stone, and much more. I was in baker heaven.


As you might remember from a previous blog, I make my own bread, but due to time constraints, and the fact that I have a bum wing,, I now make it in a bread machine. I'm seriously contemplating ditching the machine, and going back to the old fashioned way. I've also had very dim success with incorporating wheat and other grains into the bread. Could it be something so simple as hurrying my dough too fast, that led to less than desireable results? Quite possibly. This is stunning to my brain. I can slow it down, and have a better result! I am all about slow! I constantly think I must have been a turtle in a past life. I can do slow! Why don't they tell you these things in the cookbooks???

Da Hubster and discussed the bread making process on the way home from the farmer's market. He and I came up with the conclusion that the addition of sugar (or honey, or whatever is *needed* to feed the yeast) was added in during the course of time to speed things up, and it might possibly be another link in the "make it fast & plentiful* part of society that has contributed to our overweight society. It's certainly feasible. I made a small joke about sugar making the bread diabetic, and he gave a small chuckle, but seriously, folks. It's a metaphor for life...slow things can be better for you. I'm certainly going to continue to plod along, and let the slow food movement continue the right the wrongs I've done to my body over the years.

If you want to know about this wonderful lady I met on Saturday, you can look her up at www.thetravelingchef.org. Or find her on FaceBook at The Traveling Chef.  And if you local to me, you can find Lizz at the Downtown Racine Farmer's Market on Saturdays.

P.S.I also bought about a pound of sugar snap peas. I'm going to try that pickled sugar snap pea recipe I talked about in the last blog post! I'll keep you posted!

Saturday, June 25, 2011

Junque Yard

It's a nice Saturday morning. The sun is out (Sun? What's that??) It's a wee bit chilly, but in that temporary way, that you know it's going to warm up later.

As I sit outside with my laptop and cup of coffee, I watch robins stealing bits of the straw that I use as mulch in the veggie gardens. I thought it was too late for nest making, but maybe there is an over-pregnant momma out there yelling at her mate to her some more nesting materials. "Henry, get it NOW."

This week I have been enjoying lettuce, spinach, and my favorite, sugar snap peas. Right off the vine. I have them growing in a container right next to the drive way, and I always pick at least one to munch on as I walk by. Sugar snaps are delicious. And one of those things that the more you pick, the more will grow. Until it gets too hot. Then I move the container out of direct sunlight, in hopes of extending their growing season a bit longer.

I saw a recipe for pickled sugar snap peas that I want to try. You can find the recipe here. I doubt that I will get enough from my pot to make a pint (especially with me eating them all the time), but I might have to make a trip to the Farmer's Market and pick up some extra.  The recipe as it is does not call for actual canning, but you can process them, there's enough acid to cook through, especially in pint jars.

The recipe is on the Eat.Repeat blog, and I found it from "Food in Jars" on FaceBook.

http://eatrepeat.blogspot.com/2011/06/sugar-snap-pea-pickles.html

Tuesday, June 14, 2011

Junque Food - Spaghetti

From time to time I get asked about my spaghetti sauce recipe. I don't really have one. My family didn't really rely on recipes when I was growing up, unless they were trying something new and fancy. Spaghetti was the dish I usually asked for as my birthday dish as I was growing up. And since, as I kid, I had no interest in cooking, it wasw one of those meals that miraculously appeared on the table. Well, not really. But you get my drift.

My family, as I said, didn't really use a lot of recipes. The women in my family that have awesome trait of being able to dissemble a meal in their brains and say, "Ahh...so that's how it works." And that's how they would cook. It's not an exact science, and we've all had some experiments that didn't quite work out, but for the most part, it worked for our family. My talent for eating something and figuring out the spices and cooking method didn't evolve until my early 30's, but I am glad it did. It makes cooking more fu.n. And it drive DaMan and my mother in law crazy. If they don't work off a recipe, they don't cook. Hubster has mellowed on this somewhat. If he's cooking, it's something he knows how to do, or he asks me for a breakdown. He doesn't get nearly as frustrated as he used to when I tell him, "a little bit of this, and a pinch of that..."

Anyway, here's my process for cooking spaghetti. Yours, if you have one, will certainly vary. I am always of the mind that knowledge is power, so share your variations with me in the comment section below!

Ingredients I use most often:

Italian Sausage (mild or hot)
large cans of diced and crushed tomatoes (home canned when I have them)
diced green peppers
diced onions
lots of garlic (powdered when I don't have fresh chopped)
spices of your choice. I learn towards basil more and more and less towards oregano than I used to)
about a teaspoon of sugar (just to cut the acidity of the tomatoes, NOT to sweeten the sauce)
olive or any other light cooking oil


Take the saugage out of it's casings and fry up in a heavy bottomed fry pan, chopping it up as fine as you can while it cooks. Remove from heat, and drain it on a paper towel like you would bacon.

In a heavy bottomed stock pot, heat up a tablespoon or so of oil, and toss in the onion, green pepper, and garlic. Sautee the veggies, stirring frequently until the onions are translucent. Stirring often will keep them from sticking to the bottom of the pot and browning. When the onions are no longer white, add the sausage and the cans of tomatoes, sugar, and your dried spices of choice. Put a lid on, and let it come up to a boil, then take the lid off, and lower the temp to simmer.  I let mine simmer all afternoon, stirring often.

That's it! I usually make it a day ahead of time to let the flavors meld together. I taste it often and adjust spices as I need to.

The only note that I would add is that if you choose to use fresh spices instead of dried, add them at the end of cooking, and not during the cooking process.  Fresh basil tends to turn black and look unappetizing, and fresh oregano tends to turn bitter. I like a blend of dried and fresh. I use dried during the cooking time, and then chop fresh and sprinkle it on the top of the finished meal before serving. It's very pretty that way too!

So, what do you different? Tell me!

Thursday, June 9, 2011

Junque Food - Stock!

Here's a subject near and dear to my heart - Stock!

WTF?

Yes, stock. I love it. I use it constantly, for a richer and fuller flavor to my meals. If a recipe calls for water, I use stock. Broth, if I have to, but I prefer to use home made stock. And I will tell you why. Homemade stock is low in sodium, because you control what you put in it when you make it. It's easy to store, and it's an environmentally friendly way to wring out the last little bit of your foodstuffs before throwing it out or , (as in the case of the veggies) throwing it in the compost, as we do, adding another environmentally friendly layer to the mix).

You can make stock out of virtually anything you cook. My favorite is chicken, beef, and veggie stock.  All require a little forethought, but once you get in the groove, you will give it no more of a thought than you gave to meal planning in the first place.

Chicken and beef stock: First rule of business is SAVE YOUR BONES! After any meal, throw the leftover bones into a freezer baggie (one for chicken and one for beef and LABEL the bag, trust me, you will forget which is which), and put them in the freezer.  When you get enough bones to fill a stock pot about 1/3 of the way, you are in business. Throw the bones in the pot, cover with fresh cool water, bring up to a boil, then turn the temp down low and let simmer for a few hours. Ta Da!  Let cool, fish out the bones and toss, then freeze the stock for later use.

Veggie stock: Same first rule of business: SAVE YOUR SCRAPS! I know it sounds gross, but come on, you cleaned the veggies before cutting them right? Pretty much anything is fair game when it comes to veggie stock: carrot and potato peels, celery ends and tops, onion cores...whatever you were going to throw out, put it in a freezer baggie and freeze. Get a good mix of stuff in there, and then do the same thing as with the chicken and beef bones. Cover with water, bring to a boil, then simmer for a few hours. Take the strainings and throw them into your compost pile, or throw away.

Here's a great tip that I learned awhile ago for storing your frozen stock. Once it's cool, pour it into ice cube trays and freeze. Once they are frozen, put them in a baggie for minimal storage space in the freezer. Each cube is about 2 tablespoons of liquid if you need measurements for a recipe.

Great. I have now have a freezer full of stock, what do I use it for?? Whatever you want. As I said, it makes a great replacement for water in a recipe. You can substitute stock for water when making rice, I boil potatoes in veggie and chicken stock (or a combo of stock and water) when making potato salad. Last night I used veggie stock for poaching salmon fillets. And, of course, there is always soup to be made! Really, its uses are endless.

I hope you try making stock, it's fun, it's not time consuming, and it's a great way to wring a little extra out of a dollar - which is something most of us need.